Are you tired of spending hours cleaning your kitchen appliances? They still look dull and dirty. Efficient cleaning is not just about looks. It also keeps your appliances working well for longer.

With the right techniques, you can significantly reduce the time spent on cleaning. This guide will show you the best ways for quick appliance cleaning. Your kitchen will stay clean and safe.
Key Takeaways
- Simple methods for efficient kitchen appliance cleaning
- Tips for maintaining appliance performance and longevity
- Effective techniques for reducing cleaning time
- Importance of regular kitchen appliance maintenance
- Step-by-step guide for different kitchen appliances
Why Clean Kitchen Appliances Matter
Cleaning your kitchen appliances is very important. It affects health, safety, and how long appliances last. Keeping your appliances clean is key to a tidy kitchen.

Health and Safety Benefits
Regular cleaning stops bacteria, mold, and grease from building up. This keeps your food safe and reduces the chance of getting sick. Clean appliances are a big step towards a healthier home.
Extended Appliance Lifespan
Keeping your appliances clean helps them last longer. Dirt and grime make them work harder, which can cause damage. Cleaning them often keeps them running smoothly for years.
Improved Efficiency and Performance
Clean appliances work better than dirty ones. For example, a clean fridge’s condenser coil cools more efficiently. Regular cleaning means your appliances will run at their best, saving you time and energy.
Cost Savings in the Long Run
Cleaning your appliances regularly saves money. It makes them last longer and use less energy. This means you spend less on new appliances and lower utility bills.
In short, keeping your kitchen appliances clean is vital. It ensures health and safety, makes appliances last longer, and saves money. Regular cleaning makes your kitchen a safer, more efficient, and cost-effective place.
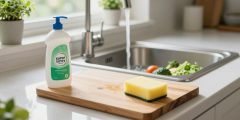
Essential Cleaning Supplies for Quick Results
The right cleaning supplies are key to fast, effective cleaning of kitchen appliances. Choosing the right products and tools can save a lot of time and effort. This keeps your appliances looking great.
Must-Have Cleaning Products
You’ll need a variety of cleaning products to clean kitchen appliances well. All-purpose cleaners are great because they work on many surfaces.
All-Purpose Cleaners
All-purpose cleaners are essential. They work well on countertops, sinks, and appliance surfaces.
Degreasers and Specialized Solutions
De greasers are a must for tough grease and grime. Specialized solutions help with specific tasks, like oven cleaning or polishing stainless steel.
Time-Saving Tools and Equipment
The right tools make cleaning faster and easier. Microfiber cloths and scrubbers are especially good.
Microfiber Cloths and Scrubbers
Microfiber cloths are soft but strong against grime. They work wet or dry and can be washed, making them eco-friendly and reusable.
Brushes and Extendable Cleaning Tools
Brushes get into tight spots, and extendable tools reach high areas without straining.

Eco-Friendly Alternatives
For those who care about the environment, eco-friendly cleaning options are a good choice. Vinegar, baking soda, and lemon solutions are natural and effective.
Vinegar, Baking Soda, and Lemon Solutions
Vinegar kills germs, baking soda is gentle, and lemon juice smells fresh and cuts grease.
Reusable Cleaning Tools
Using reusable tools like cloths and brushes cuts down on waste and saves money over time.
| Cleaning Task | Recommended Supply | Eco-Friendly Alternative |
|---|---|---|
| General Surface Cleaning | All-Purpose Cleaner | Vinegar Solution |
| Tough Grease and Grime | Degreaser | Baking Soda Paste |
| Delicate Surfaces | Microfiber Cloth | Microfiber Cloth |
Cleaning Kitchen Appliances Quickly: A Step-by-Step Guide
Learning to clean kitchen appliances fast is key. It involves knowing how to prepare, clean, and stay safe. This guide will show you how to clean your appliances well and keep them working right.
Preparation Steps for Efficient Cleaning
First, get ready to clean. This means gathering what you need and clearing your space.
Gathering Supplies in Advance
Having all your cleaning stuff ready is important. You’ll need:
- Multi-surface cleaners
- Microfiber cloths
- Scouring pads
- Disinfectants
- Special cleaners for certain appliances
Having these items ready saves time and makes cleaning easier.
Clearing Workspace
It’s also key to clear your space. Get rid of clutter and anything that might get in the way. This lets you clean without any problems.
General Cleaning Principles
Knowing some basic cleaning rules can help a lot. Two main ones are cleaning from top to bottom and working in zones.
Top-to-Bottom Approach
Cleaning from the top down stops dirt from spreading. This is especially good for appliances with lots of parts.
Working in Zones
Divide your kitchen into areas and clean one appliance at a time. This keeps things organized and makes cleaning easier.

Safety Precautions
Always put safety first when cleaning appliances. Two important steps are unplugging appliances and not using water near electrical parts.
Unplugging Appliances
Always unplug appliances before cleaning. This keeps you safe from electrical shocks.
Avoiding Water Near Electrical Components
Be careful with water near electrical parts. Don’t spray liquids on them. Use a damp cloth instead. This prevents damage and keeps you safe.
By following these steps, you can clean your kitchen appliances well. This keeps them working right and makes your kitchen healthier.
Speedy Refrigerator Cleaning Methods
A clean fridge is not just about looks; it’s key for food safety and freshness. Regular cleaning stops bacteria and odors, keeping your fridge running well.
Quick Exterior Cleaning
Cleaning your fridge’s outside is easy and boosts your kitchen’s look. Begin by wiping handles and door surfaces with a damp cloth and mild soap.
Handles and Door Surfaces
- Use a microfiber cloth to avoid streaks and scratches.
- For tough stains, mix baking soda and water to create a paste, and gently scrub the area.
Top and Sides
The top and sides of your fridge collect dust and dirt. Use a vacuum with a gentle setting to remove dust, then wipe with a damp cloth.

Rapid Interior Organization and Cleaning
Organizing and cleaning inside your fridge can feel overwhelming. But, breaking it down into smaller tasks makes it easier. Start by taking out everything and sorting items into groups.
Shelves and Drawers
- Remove shelves and drawers and wash them with warm soapy water.
- Dry them well before putting them back to avoid water spots.
Door Compartments
Door compartments can hide expired or spoiled food. Check expiration dates and throw away expired items. Clean the compartments with a mix of water and white vinegar.
Dealing with Spills and Odors Fast
Spills and odors in the fridge can be tough to handle. Here’s how to deal with them quickly:
Baking Soda Solutions
Baking soda is great for absorbing odors. Put an open box in the fridge to absorb smells, or make a paste to clean tough stains.
Preventative Liners
Using liners in your fridge makes cleaning easier. Place liners on shelves and in drawers to catch spills and prevent stains.
By using these quick fridge cleaning methods, you can keep your appliance clean, efficient, and fresh. This ensures your food stays safe and your kitchen looks great.
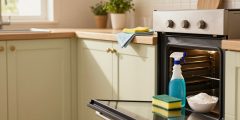
Rapid Oven and Stovetop Maintenance
A clean oven and stovetop are not just pretty, but also safe for cooking. Regular care stops grime and food from building up. This makes cleaning easier.
Quick Daily Wipe-Down Techniques
Daily cleaning can make deep cleaning easier. Just follow simple steps after each use.
Post-Cooking Cleaning Habits
Wipe down the stovetop and oven with a damp cloth after cooking. This stops food from hardening.
Dealing with Fresh Spills
Quickly clean spills to avoid stubborn stains. For stovetops, a gentle cleanser and soft sponge work well.
Speed Cleaning Burners and Grates
Burners and grates get dirty fast. Cleaning them often keeps them working well.
Removable Parts Cleaning
Soak burners and grates in warm, soapy water. This makes tough grime easier to clean.
Stubborn Grease Removal
For tough grease, mix baking soda and water to make a paste. Apply it, let it sit, then scrub.

Fast Oven Interior Cleaning Methods
Cleaning the oven interior can be tough. But, there are ways to make it quicker and easier.
Steam Cleaning Tricks
Steam cleaning is great for removing grime without harsh chemicals. Heat water in the oven to create steam, then wipe down.
Self-Cleaning Function Tips
Use your oven’s self-cleaning feature when you can. It heats the oven to burn off grime and food.
| Cleaning Method | Frequency | Effort Level |
|---|---|---|
| Daily Wipe-Down | After each use | Low |
| Steam Cleaning | Monthly | Medium |
| Self-Cleaning Function | Quarterly | High |
By using these quick maintenance tips, you can keep your oven and stovetop clean. This ensures a safer and more efficient cooking space.
Microwave Cleaning in Minutes
Cleaning the microwave is quick and easy with the right methods. A clean microwave keeps your kitchen hygienic and food evenly heated.
Steam Cleaning Shortcuts
Steam cleaning is a fast way to clean a microwave. It makes food residue easy to wipe away.
Lemon and Water Method
Use a bowl of water and lemon slices in the microwave. Heat it for 2-3 minutes. The steam and lemon scent make cleaning easy.
Vinegar Solutions
Vinegar is also great for cleaning. Mix equal parts water and vinegar in a microwave-safe bowl. Heat for 2-3 minutes to dissolve stains.

Removing Stubborn Stains Quickly
Some stains may still be tough after steam cleaning. There are extra steps to take.
Baking Soda Paste Technique
Make a paste with baking soda and water. Apply it to stains and let it sit before wiping clean.
Commercial Cleaners for Tough Jobs
For really tough stains, use a commercial microwave cleaner. These products are made to remove grime.
Odor Elimination Techniques
Microwaves can hold onto bad smells. There are ways to get rid of these odors.
Coffee Grounds and Vanilla Extract
Use a bowl of water with coffee grounds or vanilla extract. Heat for 1-2 minutes. The steam with coffee or vanilla gets rid of odors.
Preventative Measures
To keep your microwave smelling good, clean it often. Also, avoid heating food without a cover or with strong smells.
Dishwasher Maintenance Made Simple
Dishwasher maintenance is often overlooked, but it’s essential for optimal performance. Regular upkeep not only ensures your dishwasher runs efficiently but also prolongs its lifespan.
Quick Filter and Spray Arm Cleaning
Cleaning the filter and spray arm is crucial for maintaining water flow and ensuring dishes are cleaned properly. Weekly maintenance steps include checking and cleaning these parts.
Weekly Maintenance Steps
- Inspect the filter for food debris.
- Clean the spray arm to remove any blockages.
Removing Food Debris
Regularly removing food debris from the filter prevents clogs and maintains efficiency. This simple step can significantly impact your dishwasher’s performance.
Removing Mineral Deposits Fast
Mineral deposits can affect your dishwasher’s performance and longevity. Using a vinegar rinse cycle or commercial descalers can help remove these deposits.
Vinegar Rinse Cycle
Running a vinegar rinse cycle is a cost-effective and eco-friendly way to descale your dishwasher. Simply place a cup of white vinegar on the top rack and run a hot water cycle.
Commercial Descalers
For more severe mineral buildup, consider using a commercial descaler. These products are specifically designed to remove mineral deposits and restore your dishwasher’s efficiency.
Deodorizing Methods
Keeping your dishwasher fresh is just as important as maintaining its performance. Baking soda treatments and lemon freshening techniques can help eliminate odors.
Baking Soda Treatments
Sprinkle baking soda at the bottom of the dishwasher and run a hot water cycle to deodorize.
Lemon Freshening Techniques
Place a lemon slice on the top rack and run a cycle to leave your dishwasher smelling fresh.

Small Appliance Speed Cleaning
Cleaning small appliances is key to keeping your kitchen clean. These appliances are everywhere in kitchens and can collect bacteria and grime. It’s important to clean them well.
Coffee Makers and Espresso Machines
Coffee makers and espresso machines are essential in kitchens. They need regular cleaning to avoid old coffee oils and mineral deposits.
Descaling Solutions
Descaling solutions are great for removing mineral deposits. Descaling should be done every 3-6 months, depending on usage.
Quick Daily Maintenance
Wipe down the machine with a damp cloth after each use. Clean the brew basket to stop old coffee oils from building up. This daily routine helps avoid deep cleaning.
Blenders, Food Processors, and Mixers
Blenders, food processors, and mixers need regular cleaning. This keeps them hygienic and working well.
Self-Cleaning Tricks
For blenders, add warm water and a drop of dish soap. Blend for a few seconds to loosen stuck-on food.
Disassembly and Reassembly Tips
Disassemble food processors and mixers after use. Wash all parts well, especially where food can get stuck. Reassemble once all parts are dry to avoid water spots.

Toasters and Toaster Ovens
Toasters and toaster ovens need regular cleaning to avoid crumb buildup. This buildup can be a fire hazard.
Crumb Tray Cleaning
Empty the crumb tray of toasters regularly. For toaster ovens, wash the crumb tray and racks with soap and water.
Interior and Element Care
Use a soft brush to clean the toaster’s interior and heating elements. For toaster ovens, wipe the interior with a damp cloth and mild detergent.
Electric Kettles and Rice Cookers
Electric kettles and rice cookers also need regular cleaning.
Mineral Deposit Removal
Descaling electric kettles is key to remove mineral deposits. Use a mixture of water and vinegar or a descaling solution.
Exterior Cleaning
Wipe the exterior of electric kettles and rice cookers with a damp cloth. For tough stains, use a mild detergent.
By following these tips, you can keep your small appliances in top condition. They will continue to work well and stay hygienic.
Time-Saving Cleaning Hacks for Busy Households
Keeping your kitchen appliances clean is easier than you think, even when you’re busy. There are many strategies that can save you time without sacrificing cleanliness.
Preventative Measures to Reduce Cleaning Time
Preventive measures are a great way to keep your appliances clean. Use liners and covers on things like slow cookers and ovens to catch spills. Also, splash guards behind stovetops and cooktops can stop splatters from hitting countertops and appliances.
Multi-Tasking Cleaning Strategies
Multi-tasking is essential for efficient cleaning. Clean while cooking by wiping down surfaces as you go. Use the time while cooking to do small cleaning tasks. Another good strategy is batch cleaning methods, where you clean several appliances or areas at once.
| Appliance | Cleaning Task | Frequency |
|---|---|---|
| Oven | Wipe down interior | Weekly |
| Refrigerator | Clean shelves and walls | Monthly |
| Dishwasher | Run cleaning cycle | Quarterly |
One-Minute Cleaning Opportunities
Use your morning coffee routine cleaning to wipe down the coffee maker and nearby areas. Also, take advantage of waiting time productivity to quickly clean appliances or areas that need it. This can be during the time you wait for your coffee or while your meal is cooking.
Creating a Weekly Quick-Clean Schedule
To keep things clean, make a schedule that focuses on different appliances or areas each week. This ensures everything gets attention regularly. Assigning family cleaning assignments can also help share the workload.
By using these cleaning hacks, busy households can keep their kitchen appliances clean with little effort. The key is to be consistent, use the right tools, and get the whole family involved in cleaning.
Troubleshooting Tough Cleaning Challenges
Kitchen appliances sometimes need extra care to clean stubborn issues. These can include burnt-on food, rust, or mold. But, there are effective solutions for these problems.
Burnt-On Food and Residue
Burnt-on food is a common and frustrating issue. Using the right techniques and tools is key to solving it.
Soaking Techniques
Soaking is a first step in removing burnt-on food. Fill a sink with hot water and add dish soap. Soak the appliance for hours or overnight.
For tough residue, mix baking soda and water to make a paste. Apply it to the burnt area.
Scrubbing Tools and Methods
After soaking, use a non-abrasive scrubber to gently remove burnt food. For tough spots, a scrubbing brush or scouring pad works well. Rinse well to remove all residue.
Rust and Discoloration
Rust and discoloration can happen on metal or plastic appliances. Specific techniques are needed to restore their look.
Stainless Steel Restoration
For stainless steel, use a stainless steel cleaner or vinegar and water. Rub in the grain direction to avoid scratches.
Plastic Whitening Methods
To whiten plastic, use baking soda and water or a plastic whitening product. Let it sit before rinsing with warm water.
| Challenge | Solution |
|---|---|
| Burnt-On Food | Soaking, Scrubbing with non-abrasive tools |
| Rust on Stainless Steel | Stainless Steel Cleaner, Vinegar and Water |
| Discolored Plastic | Baking Soda and Water, Plastic Whitening Products |
Sticky Residue and Adhesives
Removing sticky residue and adhesives can be hard. The right removers and techniques make a big difference.
Oil-Based Removers
Oil-based removers dissolve sticky residue well. Apply, wait a few minutes, then wipe clean with a cloth.
Heat Application Techniques
Heat helps loosen sticky residue. Warm the area with a hairdryer, then scrape off with a plastic scraper.
“The key to effective cleaning is not just about removing the visible dirt but also about tackling the underlying issues that cause grime and stains.”
Mold and Mildew Problems
Mold and mildew are health risks that need quick action. Prevention and safe removal are key.
Prevention Strategies
Regular cleaning and drying prevent mold and mildew. Good kitchen ventilation also helps reduce moisture.
Safe Removal Methods
To remove mold and mildew, use bleach and water or a mold remover. Always wear gloves and ensure good ventilation.
Understanding and tackling these cleaning challenges keeps your kitchen appliances in great shape. They stay efficient and safe to use.
Conclusion: Maintaining Clean Appliances with Minimal Effort
Keeping your kitchen appliances clean is key for a healthy and efficient space. This guide offers tips to help you do it easily. You can keep your appliances in great shape without much work.
Cleaning your appliances fast and well is possible with regular care and smart cleaning tricks. Using quick cleaning methods helps stop grime and food from building up. This means you won’t have to do deep cleans as often.
Efficient cleaning not only saves you time but also makes your appliances last longer. Quick maintenance routines help your appliances work better. This can save you money on repairs or buying new ones.
By following the advice in this article, you can easily keep your appliances clean. This ensures your kitchen stays clean, safe, and efficient.